Show Posts

This section allows you to view all posts made by this member. Note that you can only see posts made in areas you currently have access to.


Topics - Thomas

Pages: 1 [2] 3
16
Feedback and Suggestions / More Matchmaker Suggestions
« on: October 28, 2014, 04:44:01 pm »
As a player, I like the idea of a matchmaker and I also like some of the old systems. However, I feel that a lot of these systems are hurting the matchmaker and making it more difficult for it to do it's job. Some features that hurt the matchmaker should be kept, such as crew form, but there are others we could probably do without.

Rematch- This probably isn't needed in matchmaker lobbies. It's basically a way to keep a lobby going, but with the matchmaker making your matches, it's unnecessary at best. And at worst, it's keeping players out of the available pool of players for matchmaking. So all of your vets might already be grouped in a lot of different lobbies and keep being put against lower skilled players because there just aren't enough high skilled players available in the pool. Without the rematch, more players are available in the pool and can be grouped more effectively.

Ship/Slot Swapping - Without a rematch, this isn't necessary. However, it is a great tool to have in custom lobbies.

Friend Join - It's nice to hook up with your friends, but you should probably do this through the form crew. Ideally players shouldn't be leaving the lobbies in the first place.

Lobby Leaving without penalty - As mentioned above, players shouldn't be leaving, especially in matchmaker lobbies. This doesn't mean they have to be punished, but perhaps rewards those who stick around?

Spectator Swapping - Unnecessary in matchmaking, assuming players are not leaving the matches. Like the other swaps, it has a high potential for upsetting the balance as well.

Custom Matches - Necessary for organized and competitive play. Not sure if it should be able to have it become a 'matchmade' lobby.

Speed of matchmaker - Right now I think the system emphasizes more on speed, but a lot of players are pushing for balance. I'd say more balance is nice, but waiting over five minutes might be too much for a lot of players.


These are just my opinions. Feel free to comment or make your own suggestions.

17
Community Events / Squid Race - Maps, Rules, Divisions, Time Change
« on: July 01, 2014, 06:19:12 am »
Squid Race


New Time: 2 PM EST

The time has been changed due to a conflict with the Sunday Community Skirmish. It is now two hours before the SCS begins. If this causes issues with too many teams, we can change the number of laps per map down to one, and move it to one hour before the SCS.


Race and Division Overview

Division 1:
Crimson Sky Menace
Clan Clan
Black Cloaks
Undo It

Division 2:
Overwatch
TryHards
Holy Celestium Order


Teams have been randomly split into two divisions. Each division will compete in races on 3 different maps (also random). Teams will be given a rank depending upon their time at the end of the race. The time depends upon their finish time + any penalties they earned during the race.

First: 9 Points
Second: 6 Points
Third: 3 Points
Last: 1 Point

The two teams from each division with the best score will proceed to the Champion Division, where they will compete in another set of three races under the same rules. Whoever comes out on top from this grouping will be crowned as the winner, and each member will receive two items from the in game store.


Race Overview

Races will occur through numbered check points. Teams may use any route they choose so long as they pass through the checkpoints. Many maps have the second (final) lap change slightly, so it's advised to review the videos and read the course descriptions below.

In past races, the text chat was not an obvious sign to begin. Instead we will have the ref or caster give the ready sign, and whichever ship is in slot 1 will fire their rear flare. When the flare deploys, the race may begin. (Don't go when the flare is fired, wait for it to deploy to avoid a penalty).

Division 1 Maps:
1. Northern Fjords
2. Battle on the Dunes
3. Duel at Dawn

Division 2 Maps:
1. Battle on the Dunes
2. Northern Fjords
3. Canyon Ambush

Champion Division Maps:
1. Duel at Dawn
2. Canyon Ambush
3. Northern Fjords


((Paritan Rumble was pulled from the map list due to the much higher chance for ship destruction. This may change in the future.))


Rules and Penalties

These rules are the same as the rules found here:
https://gunsoficarus.com/community/forum/index.php/topic,4336.0.html

They have been updated to include more specifics and penalties.


Firing the flare gun:
Before the race: No penalty, unless resulting in a false start (20 second penalty)
During the race: 30 second penalty if no ship is hit, 2 minute penalty if causing damage to another ship

Launching Mines:
Before the race: 20-120 second penalty if no immediate damage, based upon proximity to general course (if it's not on a path between checkpoints, 20 seconds). If the mine is near where ships are expected to be, 60 second penalty. Must wait for mine to go away before starting the race (takes 3 minutes). May be grounds for disqualification if mines continue to be launched.

If the mine causes immediate accidental damage, 60 second penalty. May be grounds for a restart if causing permahull damage. If it continues, disqualification from the race and restart.

During the race: Before the first check point, 30-120 seconds depending on how close to the check point the ship is. If it's immediately after the start, 120 seconds and a restart in the race. If it's right before the checkpoint, 30 seconds. In between is best judgement of the ref.


Using Tar:
Before the Race: No penalty unless damaging other ships. If damage is caused, 30 second penalty. If it continues after warning, possible disqualification.

During the Race: If used before checkpoint 2, 30-120 seconds depending upon how close to the required checkpoint the ship is. If right on the start line, restart of race along with 120 second penalty. If after the first checkpoint and before the second, 60 seconds. If shortly before the second check point, 30 seconds. (Per tar cloud)

Tar may only be used up to one time between check points (so between 2 and 3, you may use one tar cloud. You may use another between 3 and 4, etc). For each extra tar cloud used, a 20 second penalty will be applied. If this happens over 5 times, the team may be disqualified.


Kills and Deaths:

Before the Race: Killing a ship before the race is an instant disqualification.

During the Race: 0-240 seconds, depending upon severity. Ships may not 'purposely' kill another ship. In a situation where one ship is in an ideal location to be killed by another ship (ie: backed up against a wall, heavily damaged and surrounded by mines, dragging on the ground, etc), the ships are to do their best not to kill the damaged ship. If the ref notices your ship go out of it's way to kill another ship (Such as ramming them into a wall at full speed), you will be penalized 240 seconds.

If you kill another ship accidentally, such as when a ship is already heavily damaged from running into terrain and mines the whole race and then runs into two of your mines, your ship will not be penalized. It is up the ref's discretion upon one ship's intent to kill the other, and may give a partial penalty.


When your ship is destroyed, your time will be paused after you respawn. This means that your time penalty will be however long it takes you to respawn. Your ship must then proceed to the last checkpoint you completed and begin from there. Your timer will start once you pass through that checkpoint (recommended to go through at full speed and in the right direction).


Checkpoints:

Failure to pass through a checkpoint may result in a time penalty. This is only applied if a ship is reasonably close to the checkpoint. If a ship is too far from the point and merely skips past it, they cannot complete other checkpoints. If a ship passes reasonably close (such as around the wrong side of rock pillar, or not quite passing over a terrain marker) they will suffer a 30 second penalty, but be allowed to proceed to the next check point.

18
Community Events / Squid Racing - Sign Up and Rules
« on: June 12, 2014, 09:34:30 pm »

Sign Up Ends: June 29
Event Occurs: July 6 at 4 PM EST (8 PM UTC)

What is Squid Racing?

A Squid Race is where instead of fighting to the death, captains and crew agree to instead choose a Squid as their ship, and have a semi-friendly race around a predetermined course on one of the maps.

Which is what we're going to do, but in a large scale event format; trying to get a good mix of violence with good old racing.


How it works

A Team will consist of four (4) players on a ship. This ship will be a squid and have a forward and right side mine launcher. The rear weapon will be a flare gun, which is only to be used to signal the start of the race.

Depending on the number of teams participating, refs, and streams available; teams will be assigned a group and compete in races on three randomly determined maps. Groups, maps, and courses will be shown Monday (June 30th). These will include a series of pictures and/or video walkthroughs to help teams learn the courses accurately.

Teams will be awarded points depending on their total time at the end of each race (eg: First is 9 points, Second is 6, etc). The teams in each group with the best score after a series of three races will move onto the Championship Race, and compete for total victory in another series of 3 races. (prizes tbd)


Each race will consist of a series of checkpoints that teams must pass through in order to complete the race. How they reach the checkpoints is up to them. Each race will begin with the ships gathering at a predetermined location and getting relatively lined up and stationary before ship #1 fires a flare. Once the flare deploys, the ships may begin racing. Rules will be enforced by referees to ensure fair play. Breaking a rule will result in a time penalty or possible restart of the race depending upon the severity. The race ends when every ship passes the finish line. At the end of the race, the red or blue side will surrender based upon the color of the ship who came in first (if Red comes in first, blue team will surrender and vice versa).

Courses and Laps will attempt to create a match that isn't too short or long to allow for a number of low commitment games to be played in a decent amount of time while still being entertaining.


Rules:
  • Teams will consist of a single ship of 4 players. Incomplete teams will not be allowed
  • Players may only race for one team for the duration of the event
  • The flare gun may -not- be fired unless directed by the Ref at the beginning of the race
  • No mines may be launched until passing the First checkpoint
  • No tar may be used until passing the second checkpoint
  • Each team may only create one tar cloud between check points (For example: You may create a tar cloud between checkpoints 3 and 4,  and then another between 4 and 5; but you cannot create two tar clouds or more between check points). You cannot 'save up' tar clouds.
  • No deliberate killing of ships. (eg: If you see a ship floundering against a canyon wall, do not ram into them at full speed to kill them. If you see a ship run into 4 mines and start sinking to the ground, do not fire a mine at them to finish them off)
  • If your ship is destroyed, your time will be paused and you must pass through the check point you last passed through to begin your timer again.
  • You must pass through the checkpoints in order as outlined by the course description (to be released)
  • Breaking a rule will result in a time penalty depending upon the severity (Guidelines and examples will be released the same Monday as everything else)
  • If the rule breaking is severe enough, the match may be reset and/or a ship could be disqualified (continually mining everyone at the starting line is an example)


TLDR: Squid Race (4 players per team), use the sign up format below. The groups, courses, and other information will be given on June 30th. If you're interested in Reffing, streaming/casting, or other please contact me. Feel free to discuss the event in this thread.

-------------------------------------------------------------------------------------------------------------------------------------------------------
-------------------------------------------------------------------------------------------------------------------------------------------------------


Sign Up Format:

Team Name:
Logo: Optional
Point of Contact: In game name or steam ID, or skype
Team Members: List at least four
Verify that you have read and fully understood the rules


19
Guides / How to Captain
« on: June 02, 2014, 04:31:57 am »
This is a basic introduction and theory for captaining during matches. There are three sections:

Captain Overview:
-What a captain is, what they do, and how to do it

Pre-Game:
-Setting up the ship, organizing your crew, and preparing for the match in the lobby.

Playing the Match:
-What captain's should be doing in the match.


Captain Overview

Captains or Commanders are those members in a crew who are in the topmost slot on a ship. Being in this position gives that player control over what ship and loadout will be used, being able to use the Captain chat, and being able to set the AI priorities. Generally this player will be playing as the pilot, giving them a better position to monitor the field and their crew.

The main responsibility as a captain is to keep your crew organized and focused. Captain's are not just simple pilots, they are the strategists and the first line of communication. This guide will not focus on piloting techniques.

Basic Controls:

X : Crew voice chat, used to talk with your ship. (All chat in the lobby)
C : Captain voice chat, used to talk with your ally captain(s). (Team chat in the lobby)
L : Crew text chat
K : Team text chat
J : Match text chat
F1 : AI, Default Priority (Engineers will repair if there's damage, Gunners will stick to the guns)
F2 : AI, All Attack (Engineers and Gunners will try to use the guns)
F3 : AI, All Repair (Engineers and Gunners will ignore the guns and focus on repairing)
V : Signal Menu (Use w, a, s, d, r, f to navigate to the desired signal)
B : Captain Spot (Special mark on an enemy ship, only one can be marked by the captain at a time)
M : Map, holding M will open the map


Basic Strategy:

The first step is communication. Generally you want to use voice chat when possible to communicate with your crew and ally captains to ensure that things are organized. Having your crew trying to run around and do everything generally ends with something important being neglected, while failing to communicate with your ally can put one of both of you in a bad situation (such as one of you assuming that you'll both charge the enemy when they're spotted, while the other believes that you'll pull back and peck at them until they're close).

Without using voice chat, a fast way to communicate with your crew is with the voice commands (Signalling). This can give them key information without you needing to type it all out, and also helps if there is a language barrier. You can follow this up with using the Captain Spot to identify the target you wish them to fire upon. The only downside is having no rapid way of communicating with your ally except the text chat.


Pre-Game

Much of the strategy happens well before the match even starts. Ship choices and crew loadouts can win or lose a match.

Setting Up:

The first thing you need to decide is what ship to bring, what weapons to have, and how to organize your crew. Your ship choice should be made to compliment your ally, and work well against your enemy. If your enemy is all Pyramidions, you will likely have a hard time trying to use carronades. If you ally is bring a ship and a mindset to charge in all the time, you may have trouble trying to use a stealthy or long range support build.

Your ship should also compliment the map. If you bring a mobula to Paritan Rumble, it's going to be tricky to turn around and you're more likely to bump into buildings.


Once you've chosen your ship and playstyle, you need to inform your crew of their roles aboard the ship. This generally falls into a main gunner, a main engineer, and a 'gungineer'. The main gunner doesn't have to be a gunner, but the gungineer should almost always be an engineer. The main gunner has the role of being on a gun and ready to fire at all times, while the main engineer should always be ready to repair the hull and other nearby critical components. The gungineer needs to be flexible between shooting and repairing.

Once they have their roles, ensure they have equipment appropriate for where they're going to be. Remember to inform them of where they should be on the ship. You don't want your main gunner on a galleon running upstairs all the time to try and use the rear gun just as much as you don't want your main engineer running downstairs to try and fix the guns. Give them certain tasks and areas to stick to for 'most of the time', but remember to be flexible and give them orders to go elsewhere as needed (You might actually need the gunner on the back gun of a galleon if some squid keeps popping your balloon and is hanging out behind you).


Playing the Match

This is what all the buildup is for, the match itself. As a captain, you have to remember that you're more that just a pilot. You need to be thinking ahead and planning instead of blindly reacting to every situation.

Match Start:
As the match begins, make sure you're crew is loaded up and where they should be, remember to communicate with them, and they'll be more likely to communicate with you. Talk with your ally, at this point you should already be planning on how the match is going to start. Should you try approaching the enemy, or let them come to you? Try baiting them with one ship and sneaking around with the other? Sticking together, or splitting up?

There's no best strategy, but knowing your ships, the enemy ships, and the map, you should have a good idea of what is more likely to work; or at the very least a good idea of what isn't going to work.


Match Progression:

As the match continues, remember to be flexible and be continually planning and paying attention. Check your map as needed, remind your crew to focus on what needs to be focused on. You need to keep your head on a swivel and be aware of what's happening all around you. Where is your ally, what are they doing? What is your crew doing? Where is the enemy, what are they doing? If you don't know where your enemy is, try to predict what they'll be doing. Are they going to rush back in after you killed them to save their ally, or are they going to hold back and wait for their ally to go down and respawn as well? What direction are they most likely to come from?

This should be happening in combat as well. Is your ally going to live? Are you both splitting too far apart? Is it safe to leave one ship disable as you return to your ally for a secure kill? As you're backing away and firing at the enemy, is there some terrain behind you that's going to make things go terrible?

Overall Message:

Like I've mentioned a few times, being a captain is way more than just piloting. Use your head, think and plan, and definitely communicate. Even if your plans and predictions don't work out, don't worry. Most players would rather go down in a ball of fire with a captain that's communicating than with someone who doesn't say a word. With time and experience you'll gain the knowledge you need to make better and better judgement calls depending upon the situation. Stay flexible, and keep aware of what's happening aboard your ship as well as on the map.

20
Community Events / Guns of Icarus Online - Fantasy League
« on: April 03, 2014, 12:24:21 am »
The Idea
Piggy-backing off of the League play currently being developed discussed here:
https://gunsoficarus.com/community/forum/index.php/topic,3799.0.html

I think it might be fun to have a 'Fantasy League' to pair along with it. Similar to Football and Fantasy Football. With the highly organized and predictable nature of the proposed League, it should be pretty simple to get a Fantasy League running alongside it.

How This Works
It's based upon the same structure as any other fantasy team. We have a roster of players who will participate in the league, and those wishing to take part in the Fantasy League build their own 'team' from this list. The players receive points for their performance in League matches.

However, we are limited to actions that can be easily tracked, particularly from a streamed game. While it's possible to have players screen shot their end match performance stats and send it in, that's a bit of a hassle and also not an accurate representation of their performance.

For our purposes, we will divide players into two categories, 'Captains' and 'Crew'. The Crew players will earn points for any action that is reported by the combat log (upper left of the screen), which is parts destroyed and parts rebuilt.

Crew
  • 1 Point per Gun Destruction/Rebuild
  • 2 Points per Engine Destruction/Rebuild
  • 3 Points per Balloon Destruction/Rebuild
  • 4 Points per Hull Destruction (+1 if this is followed by the ship being destroyed)
  • 5 Points per Hull Rebuild
  • -2 Points per Disconnect (or divide total score in half if Fail to Return)

Captains will receive points based upon their crew performances, match outcome, and match performance.

Captains
  • 50 Points per Ship Kill
  • -20 Per Ship Death
  • (Sum of Crew Score)/4 ((The average score of the crew))
  • (Average Survival Time)/(Match Length)*50
  • -10 per Disconnect (Divide Score by 4 if Fail to Return)
  • Sum of End Game Score * 1.5 (if Victor)


How to Create a Roster

There's a few ways for participants in the Fantasy League to make their roster.

The easiest and probably most boring is for an All Pick, where you can compose your team of anyone, even if they've already been selected in someone else's team.

To keep it interesting and competitive, we can go with a Random Pick or Draft Pick. With a random pick, your team will be assigned to you, where with a Draft Pick, players take turns choosing from the Roster. Generally the turns will be based upon your performance in the previous Fantasy League. Also due to the time it would take, it's probably best to go with Random, at least for the initial Fantasy League.

Your Roster will be composed of 14 Players.
2- Captains
6- Crew
2- Replacement Captains
4- Replacement Crew

Only the score from 2 captains and 6 crew will be used each week. You can change your crew formation anytime before those weeks matches are played.

Replacements will be used when someone in your starting team does not participate in a given week.

For example if a team in Match 1 has one of your players, but that player couldn't make it. Your #1 replacement will have their score used instead. If your #1 replacement also didn't play, your #2 replacement will be used. If Match 4 happens and another one your picks is missing, your #3 replacement will be used in their stead. If you don't have enough replacements for the number of players missing, you will only get scored for the players that played. (ie: if only 7 of your 14 players played, you will only get points for those 7).


Trading

Part of the fun for Fantasy Teams is building up your team, which is where trading comes into play.

All trades must be completed before 1 AM Thursday (GMT) to be official. Both players must notify the organizer before this time (probably in a thread). Scores previously earned by the players are not transferred.

Once the Final Tournaments begin, there is no more trading allowed.

Prizes

Ideally there will be a prize for the player who earned the most Fantasy Points at the end of the season. This has yet to be discussed or determined (although I'm fairly certain we could get Muse to chip in costumes <3 ).


Discussion

The set up and proposed rules and scoring system are still in the drafting phases, so any input would be appreciated. What should change, what should stay, and why? Did we leave out anything important?

21
The Gallery / Icarus Rising - 2D mmorpg
« on: March 31, 2014, 12:46:23 am »
http://youtu.be/2mTpOH4jrkg


Engineer making use of Tesla weaponry

About

Icarus Rising is a project that started a little over a year ago. The goal was to create an old school mmorpg based off the GoIO world. For this project, we're using the Eclipse Origins engine ( www.eclipseorigins.com ) which is a free 2D mmorpg maker. Due to it often being used for fantasy games, we had to create a lot of custom assets and tweak the code quite a bit.

Events in the game are very loosely based around the initial Flight of the Icarus, hence the title. Players create a character and are able to customize them however they like (with no effect on their stats). They choose a role, which they are able to swap out of, and learn techniques/skills based upon their role. (Gunners can use incendiary rounds to light targets on fire, while engineers can attack enemies with a chem spray attack, slowing them down; etc).

Key Features
  • Custom Character (90% complete)
  • Clan Creation and Support (90% complete)
  • In-game Factions (70%)
  • Player Driven Economy (0%)
  • Town Development/Conquest (60%)
  • Personal Airships (10%)
  • Unique Roles and Role Development (80%)
  • Large Open-ish World (95%)
  • Crafting (10%)
  • PvE and PvP (70%)
  • Possibly More? (0%)

Where we're at now

As you can see from the video, things are still pretty rough and slow going. It started as a team of 6, but has been reduced to a team of 3 working on the project on and off. What we really need are people who can help create graphical and sound assets, as well as a larger community for testing. We've been working with some members of the EO (Eclipse Origins) community to help on the project, and have reached a point we feel the GoIO community won't chase us off with Pipe Wrenches (=D I made the pipe wrench in the video ).

Right now we're in the process of setting up a better server that can handle the increased traffic and an official website with forums, game information, download links, email, the works. Up to this point we've just been using some free forums (enjin) and our personal emails. Once the website is up and running (I think he said we'd be ready to make it public by Wednesday, but it may take longer) I can post a link to sign up. Until then I think I can see about setting up a place to download the client from.

Thanks for your support!

22
Probably not the most popular idea, but an interesting one.

Essentially a lot of ships are not ideal for newer players. This is pretty obvious to most players, especially when we restrict their choices in the novice matches anyways. However, a lot of inexperienced pilots still try to take the helm of difficult ships like the mobula and spire, and end up getting stomped incredibly hard by players around the same experience using easier ships.

The idea is that the more difficult ships will be become unlocked as they rank up their pilot level or play more matches as a pilot. A lot of new players seem to expect this kind of mechanic anyways, and are surprised when they find out they have access to all the ships from the get go.

23
Gameplay / Buff Hammer
« on: February 22, 2014, 04:59:41 am »
The buff hammer is by far one of the most powerful tools in the game. This is largely because it appears to not fit the scheme of risk vs reward. Everything else in game is based around balance. You increase one thing, you decrease something else. Longer range guns hit weaker, or are harder to aim. Faster ships tend to be softer and easier to damage, where big tough ships tend to be slower and less maneuverable. All the gun ammo's have their pro's and cons. Even the engineering tools play the sacrifice game. The fire ext is good at putting out fires, but bad at preventing them; where the chem spray is on the opposite end. The mallet has the best repair per second, but has a really tough time rebuilding.

The only tool outside of this scheme is the buff hammer. The only downside to having it is not having a different repair tool, which... isn't really all that much of a downside at all. Often competitive teams find ways to slip in at least two buff hammers on the ship.

I think the buffs should come with some downsides, to help balance out their use.

Hull: +30% armor, +10% drag (vertical, angular, longitudinal)
Balloon: +100% lift force, -25% vertical drag, +25% angular drag
Engines:
-Turning Engines: +25% Power, +5% longitudinal drag
-Main Engine(s): +25% power, +5% angular drag
Guns: +100% health, -10% turn rate


I don't think the buff kit should be increasing gun damage. Also there's the issue of how easy it is to break guns, so turning it into a gun health buff makes it harder for those guns to break.

Ideally they would have other negative effects besides mobility, but it's the best I could think of. Ideally making your ship tougher decreases your mobility, while increasing your mobility in one area makes it's harder in another.

Thoughts and other suggestions?

24
Feedback and Suggestions / Sequential Ammo Combo's
« on: February 22, 2014, 04:38:28 am »
I'd like to start off by saying that the goal of this suggestion is to improve gunner performance; but that does not mean gunners are useless. Please do not debate about the usefulness or uselessness of gunners. There's other threads for that, thank you.


The concept behind this idea is to take what I believe is one of the weaknesses of the gunner, and turn it into a strength. That is the reality that only one ammo type can be used at a time. Generally speaking, there are a few ammo types that are good for each gun, and the one you choose depends upon your preference and the situation. For instance, some gunners like to use lesmok in the gatling gun to get some early hits in, but by the time the captain has closed the distance to where you could use greased, you still have half a clip of lesmok left. You sacrificed your total damage for extra range, but now that you no long need the range, the ammo choice is actually less useful than a normal clip.

Instead of combining ammo types to give you the positive and negative effects of both, the idea is to use one ammo after another to create a somewhat separate effect from the initial ammo types. So for example you might have the flamethrower and are using greased, then switch to incendiary afterwards. This leads to a sequential combo. Instead of incendiary ammo being put in, you get 'tar ammo'. This doesn't apply the greased or incendiary effect, but a different effect. In this example it might be reducing the clip size and chance to ignite fires by 10%, but also has a 30% chance to remove the effects of chem spray per shot.


Ideally you'd need a way to decide between using a sequential ammo or a normal ammo type. I think the best way would be to have the gun be reloaded manually instead of reloading after you emptied the clip. So to choose normal greased instead of tar ammo after using incendiary, you'd empty the whole incendiary clip first. But if you wanted tar, you'd reload the gun while there's still some shots left.


We'll start with the normal ammo:

Burst
+20% clip size, -15% rate of fire, +50% aoe

Charged
-20% clip size, +30% damage, -15% rate of fire

Greased
+20% clip size, -20% damage, +60% rate of fire, -20% projectile speed, -15% gun rotation speed

Heatsink
+30% clip size, -25% damage, +50% gun rotation speed, -30% projectile speed, prevents additional stacks of fire while loaded

Heavy
-25% clip size, no spread/recoil

Incendiary
-25% clip size, -30% rate of fire, -35% projectile speed, +25% chance of ignition

Lesmok
-30% clip size, -30% gun rotation speed, +70% projectile speed, +30% projectile lift

Lochnagar
1 round, +125% damage, -90% gun rotation speed, no spread/recoil, -60% arming time, -50% aoe, heavily damages gun

((At the time of this post I am almost passing out and steam is having issues, so I can't open the game. I have used information found from other sources for the ammo types. Some things may be inaccurate, please correct me when possible.))


Initially the idea was to have a combination between each and every ammo type, but then I thought that some combinations didn't make much sense. For instance, greased and lesmok are pretty much opposite ends of the spectrum; kind of like incendiary and heatsink. So then the idea evolved into having each ammo have a combination with every other ammo, except one. But this lead to over 20 'new' ammo types, which was a bit much. Toning it down further we arrive at each ammo having a sequential combo with 2 other ammo types.


Sequential Ammo Combo's (Order is irrelevant):

Incendiary+Greased= Tar Ammo ; clip size -10%, ignition chance -10%, 30% remove chem spray buff

Incendiary+Heavy= Solar Ammo ; clip size -60%, 100% ignition chance

Lesmok+Lochnagar= Ragnarok Ammo; Single shot, secondary damage changed to impact, +200% damage, 500 gun damage, 50% of shot damage to own ship

Lesmok+Heatsink= Cooling Ammo ; -40% clip size, friendly fire, +50% to remove fire stack, 200 gun damage upon emptying clip

Charged+Burst= Thunder Ammo ; -30% projectile speed, +20% aoe, +10% damage, bright flash on hit

Charged+Greased= Super Charged Ammo; -20% clip size, +20% damage, +50% rate of fire, gun takes 100 damage after emptying clip

Heavy+Lochnagar= Big Bang Ammo; Single shot, primary damage changed to impact, no recoil/spread, +150% damage, 35% of shot damage to own ship

Heatsink+Burst= Emergency Ammo; -80% projectile speed, friendly fire, -60% clip size, puts out all fire on own ship, 40% chance to remove fire stack on hit, 200 gun damage upon emptying clip, applies 6 seconds of chem spray buff to own ship


This leads to 8 mildly crazy ammo types that can be more effective in certain situations than the regular ammo types alone. ((obviously things got weird, I'm a little tired))

The idea is for ammo types exclusive to gunners. Something they can use by using one ammo type after another, where an engineer can only bring one ammo type. Then it lets them break into the repairing and supportive roles a bit through weird ammo choices. It opens up a lot of different play styles. ((Note that none of these can be used with mines, since you can't reload the mine launcher after firing part of the clip, since it only has one shot)).


Overall I think it'd be better to get feedback on the concept than the specific suggested ideas (things got really weird there). Although I'd still love to here feedback on all of it.

25
Community Events / 1300 Meters or More - A Love Story
« on: February 11, 2014, 11:49:16 pm »


Day: Tuesday (2/18/2014)
Time: 6:00 PM (EST)

This is the first event brought to you by Achievement Days
http://steamcommunity.com/groups/GoIO-AD
https://gunsoficarus.com/community/forum/index.php/topic,3344.0.html


This post-valentines day event tells the story of men and women of the sky trying to share their love with one another. The only thing standing in their way is a mountain of social awkwardness and a severe case of the butterflies.

Unable to overcome their timid nature, these aeronaughts turn to their endless ingenuity, firing letters and packages from 1300+ meters to their special someones that reveal their true feelings! Love triumphs all!


-------


The rules are pretty simple. Captains are required to bring a range finder and maintain a distance of at -least- 1300 meters from their targets, destroying them with their love from afar. Ships that move too close must make all efforts possible to return to further than 1300 meters. Repeatedly 'crossing the line' and killing ships under that range will disqualify you for the next Achievement Days events.

The goal is to help players complete the difficult achievements requiring kills over long ranges without actually handing out kills, you still need to earn them. The map will be based upon the number of interested persons.


Please post below if you're interested along with which class you'd like to play. The password of the match will be whispered to you in game on the day. (Match is passworded to help enforce the extra rule).

Hope to see you there!
(Event may be streamed)


26
Feedback and Suggestions / The Bounty Season
« on: January 29, 2014, 02:00:50 am »
I paid more attention this time around to the Bounty Season than I normally do, and I've noticed some issues beyond the [Wanted] tags (please discuss that particular topic in the other thread).


First is the point system. Bounties earn points by winning matches, while Bounty Hunters get points for defeating bounties. Something new I learned this time around was that Bounty Hunters can only claim each bounty once, as opposed to farming them for points. Interestingly, bounties can actually be bounty hunters as well (go figure); although of course they are at a disadvantage because they cannot claim their own points (I'm here to turn myself in, do I get the reward?), but I think that's pretty acceptable.


The next is the extreme lack of activity from the bounty sign ups. About halfway through the season, half of the bounties didn't have a single win. I can't be sure if they had signed in during that time, but I want to believe that if they did, they could get at least one win. At the end of the season we had:

2 Players with more than 100 wins
5 Players above 50 wins (3 between 50-100)
13 Players above 20 wins (6 between 20-50)

and

30 players with 0 wins

(All the 'above' categories includes everything above it as well.)

This is out of 75 players who signed up. Only 17% of the players signed up got above 20 wins, and 40% of the bounties didn't even show (or at least didn't win any).


This makes it difficult for players who want to win bounty hunting points, but can't find any bounties.


There should be a system in place for more bounties to be put into the system. Such as, if a bounty isn't active for more than 36 hours, they get removed from the bounty list, and their slot opens up. (Although the bounty season is pretty short, but 24 hours seems a little too intense).


There's also some pretty large divisions in the scores, but there's not a lot that can be done about that; and is mostly related to how active a player is.


Thoughts? Other suggestions?

27
Gameplay / Pilot Skills - Chute Vent/Hydrogen
« on: January 29, 2014, 01:34:53 am »
I've brought this up before, but I'm doing it against because it just really bugs me. xD

Personally I think the negative side effects of the chute vent and hydrogen are significantly more... well negative than other pilot tool items, especially when you compare it to the positives.


Hydrogen
-60% vertical drag
+350% climb force
+50% chance fire ignition
75 dmg/s
Effects last for 3 seconds after deactivation


Chute Vent
-60% vertical drag
+200% descent force
65 dmg/s
Effects last for 3 seconds after deactivation


Moonshine
+200% thrust
-50% longitudinal drag
+1000% angular drag
30 dmg/s


Kerosene
+150% thrust
+300% angular drag
10 dmg/s


Phoenix Claw
-65% angular drag
+300% longitudinal drag
13 dmg/s


Balloon HP - 1200
Heavy Engine HP - 525
Light Engine HP - 300


We're going to compare the main tools for mobility. Things in green are treated as positives, while things in red are negative side effects. Things in blue can go either way (although in most cases, they're good things. Think ramming without having your ship bump off course).

The first interesting thing to note is the activation period. The balloon tools are the only ones on this list that continue to be in effect even after de-activation. (Other tools that continue are drogue chute and bumpers, which reduce engine output but don't damage components)

The next thing is that the balloon tools only act in one direction, where the remaining tools act in two directions. Kerosene/moonshine works forward and backwards; where phoenix claw works both left and right. Hydrogen only benefits the up direction, and chute vent only works in the down direction.

Finally we come to the sheer amount of damage.
Hydrogen does 6.25% of the balloon hp per second of use (for a minimum of 18.75%; or 225 total damage)
Chute vent does 5.41%, for a minimum of 16.25% (or 195 total damage)

Where kerosene is only 1.9%/3.33% (Heavy/Light), Moonshine is 5.7%/10%, and phoenix claw is 2.48%/4.33%
With each of them only lasting as long as you have it active (have a minimum damage of 10, 30, and 13 respectively)

It should be noted that as components become damage, their function is reduced. This can be seen with damaged engines, guns, and balloons. The more damage, the more performance suffers. And this isn't even bringing up the added ignition chance on the balloon for hydrogen.


Finally getting to the point, I feel that that the balloon tools should be adjusted more in line with the other tools listed here. I use these tools often, but don't enjoy being held back by the side effects. They're extremely detrimental, and don't provide all that much of an advantage. The balloon gets damaged a lot, especially if you keep it active for more than a second, and since it remains active, it becomes very difficult to get the precision you can with other tools.

Sometimes I shoot upwards to avoid damage or get into position to attack, only to find my enemy descending. I can't give chase because the helium makes it difficult to return to descending. If I activate chute vent right after, the damage piles up aggressively and the tools counteract each other. Then there are the times you start up with chute vent, but have to continue using it for 3 seconds while your balloon is being damaged, hurtling towards the ground.

Comparatively I can use moonshine or kerosene to get my ship into position/out of the line of fire, and can get it exactly right. Even if I'm about to overshoot my mark, I can just change directions using the same tool.


Ultimately, I would like to see the hydrogen and chute vent changed. Preferably removing the continued activation, and reducing the damage just a smidgen (maybe 50-55 dmg/s? ; as well as having the ignition chance removed completely, because that feels a bit like overkill. Right now they do server a role, but I really would like to see more of an up and down game in guns of icarus online; instead of reserving those tools for emergencies only.

Thoughts? 

28
The Docks / Achievement Days - Group
« on: January 25, 2014, 01:10:29 pm »
http://steamcommunity.com/groups/GoIO-AD

Ever find that achievement you just can't seem to complete? Tired of trying to fill up a 4 vs 4, capture 60 points, shoot down your enemies at 1000+ meters or even harpoon them repeatedly?


Well here's you answer. No long do you have to try and do this all on your own, as the Achievement Days group is here to help. The objective of this group is to set up times, days, and achievement goals that players can work for together.

This is not a 'I kill you, then you kill me' sort of deal. These will be regular matches playing for wins, but with extra conditions on top to promote completing achievements.

For example, we might set up a 3 vs 3 on Water Hazard, but you have to use long range ships and stay at least 1300 meters from the ship you're targeting. Another day we might do a 4 vs 4 death match on Red Sepulcher, but you have only use harpoons and mines. Or even a 2 vs 2 King of the Hill, but after capturing the hill, you have to exit the capture area and cannot block captures (although you'd be encouraged to kill them from outside the zone) to promote more back and forth captures.


Ultimately the Maps we play and rules we toss on top are up to the players. Ideally I'd like to set up daily times for this to occur and the rules/maps ahead of time; but this may not be the case.


So I turn to you, what achievements are you having trouble completing that this kind of group can help you with? (Buffing guns, doing full repairs, etc you should be able to do on your own over time. And since we're not giving out wins, we may not be able to help with 'win with a perfect score'). Again, this group is to give you more opportunities, not hand out achievements.


----------------

Times and Days Available (EST):

Pilot Achievements:

Engineer Achievements:

Gunner Achievements:


Example:
Times and Days Available (EST):
I'm available most afternoons and evenings during the weekdays, and all the time during the weekend.
1-2PM, 3-5 PM, and 6+PM on the weekdays.

Pilot Achievements:
-Destroy 25 Ships at 1300+ meters
-Destroy 25 Ships with mines
-Capture Control Points
-Refinery Map


Engineer Achievements:
-Refinery Map
-Capture Points
-Destroy Ships at 1000+ meters

Gunner Achievements:
Not currently working on

29
Guides / A Squidsassin's Guide to Squidsassinating
« on: January 20, 2014, 06:57:40 pm »
About This Guide

This guide is for the cunning, the captain that seeks not only to destroy their enemy, but do so in a way the provides the least risk to their ship and crew. This guide is about stealth, ambush, and more. It is not necessarily only for a Squid pilot, but it has the squid mindset at heart. Please enjoy.


The Brief Version

The idea is use stealth and misdirection to sneak upon your enemy and destroy them before they have a chance to respond. How this is done varies greatly upon the map, the players, and the ships involved. Highly coordinated teams are extremely difficult to sneak up on, especially if they know the map. However, this knowledge can be used against them.

In general you will need to use terrain, cloud cover, and your enemies blind spots to approach. The most important factor is the vertical distance. Many ships (and players) have a harder time looking up or down, as opposed to straight off into the horizon. The further you are from their ship, the easier it is to see you, which is why you need to use terrain and other cover to approach as close as possible. The best method is to use your ally as a distraction. If they have something to look at, or at least somewhere to look, they're less likely to spot you.

Once the distance has been closed, commence the ambush. Strike hard and fast, hitting them in their blindspot. Some ships are easier than others. Very often you'll be initiating solo, so you'll have to either run away fast, or hold out for your ally if things don't happen perfectly (they almost never do).


The Rules of Squidsassination

As an assassin, there are a number of rules to follow. These mostly involve common sense things like communicating with your team, working with your team, and to only use your power for good; although that last one is usually skipped over to save time.

As for the real rules, they are as follows:

-Know your ship
-Know the enemy
-Know the area


Know your ship

Knowing your ship is the most important thing. Before knowing your enemy and knowing the area, you have to know yourself. What is your ship capable of? Did you pick something fast and agile? Something slow? Does it turn well? Rise and descend? Depending on how your ship handles (and what weapons your brought) will depend upon your approach and engagement of the enemy.

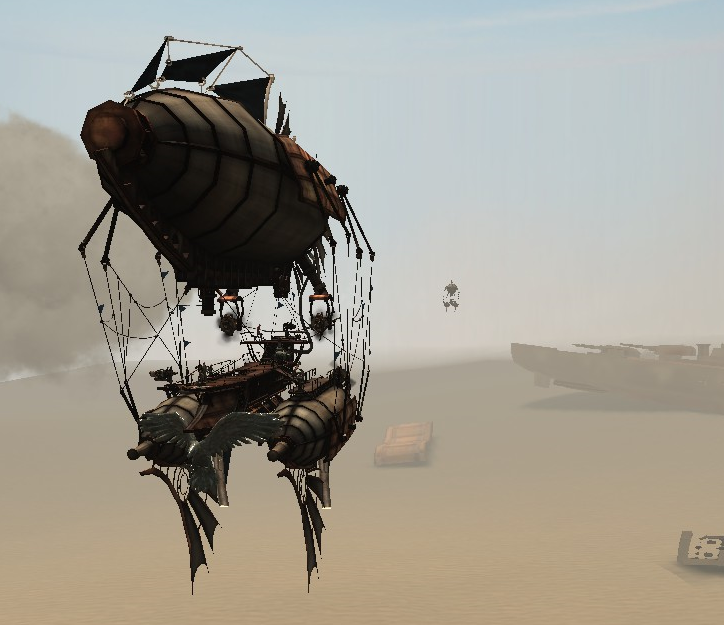
For the purpose of stealth, you usually want something that's a bit speedy and not all that noticeable. A galleon for instance, is incredibly slow and very difficult to hide. While a squid is a lot more nimble and less obtrusive.

Ship Stats

ShipArmorHealthSpeed (m/s)Acceleration (m/s2)Turn Speed (degrees/s)Turn Accel. (degrees/s2)Vertical Speed (m/s)Vertical Accel. (m/s2)Mass (tonnes)
Goldfish400110040.113.513.997.9916.993.25150
Junker70050026.014.316.1815.2417.063.00125
Squid23085047.005.5018.9520.0017.004.00115
Pyramidion65070032.002.5011.006.2516.972.75200
Galleon800140030.022.108.025.0617.012.25320
Spire40075025.993.0011.9915.0217.003.75150
Mobula60070028.004.2514.023.517.017.5120


In the table above, colors relate to relative places in the categories. The best get green, followed by blue for next best; red being the worst in that category, and orange being right above the worst.

Knowing how your ship handles, as well as it's profile (shape/size) can help you determine how you're going to plan your approach. A squid or spire can fit through a lot of narrow spaces where ships like the mobula would get stuck.


Pilot Tools

Along with your ship, you need to decide what piloting tools to bring. It is recommended to bring mobility items over utility items. Sudden bursts of speed, rapid rising or descent can make a huge difference; as opposed to bumpers or the range finder. Tar isn't a bad option, but while it obscures the enemy vision, it also gives a very clear indication of where you are or have been.

When picking items, you also have to decide whether to maximize the strengths of your ship, or compensate for weaknesses. A goldfish or pyra may want to bring a phoenix claw to make up for sub-par turning, where a squid could leave that item at home; or even bring it for light speed rotations.

Personally I recommend a kerosene or moonshine along with both the hydrogen and chute vent; unless you need the phoenix claw, in which case leave the chute vent behind. A lot of ships and weapons have harder time rising and aiming upwards than shooting downwards.


Know your enemy

Once you know yourself, you have to know your enemy. Pay attention to the ship they bring and the weapons they have on them. Some ships are easier to approach than others, but that won't help you much if run into one of their mines or find out that sniping ship has close range alternatives.

Difficult ships to approach are the Junker and Squid, where easier ships to approach at the Goldfish, Spire, and Mobula. Galleons and Pyramidions are neither easy or difficult.

The Squid is hard to approach due to the lack of obstructions to view that most other ships have. They often have the engineers running all about the ship who will notice an approaching ship. The Junker has a similar issue, with lots of open unobstructed view; and more importantly weapons all around, along with the fast turning.

The Goldfish, Spire, and Mobula tend to have a weakness near the rear of the ship, as most of the crew is focused on facing forward or off to the sides. The Goldfish less so than the others, since the engineers will still be moving about and keeping their eyes open. While on a mobula they're almost always stationed by the front guns.

For the Pyra, the gunners are often forward facing, and the back engines and balloon make it difficult to keep an eye behind the ship, but the lower deck engineer often keeps an eye to the sides and behind. The galleon has the pilot looking forward and off to the sides, while the crew have an easier time looking all over.


Always attempt to approach a ship from their 'blind side', which is both where they have no/few guns and can't see you. This depends on the ship and their loadout. For instance, if a galleon has a lumberjack/flak side and a hwacha/carronade side, you can feel fairly safe at getting very close to the long range side, as the arming times will prevent much of the damage from affecting you.

Be aware that it's ok to change your ship choice based upon what your enemy brings. It may not be smart to try to sneak up on a junker with a squid, since you'll never be able to avoid their guns, but a pyra or goldfish might be able to take it out without as much incident.


The final part of knowing your enemy is actually knowing them. You want to keep track of their location, as well as knowing how they tend to play. This may be more difficult in random matches, but you can usually figure it out after the first engagement or two. A lot of structured teams often play the same way from match to match, making it easier to figure out how to approach them.

Know the area

This is my favorite section of the guide. Knowing your ship and the enemy is all well and good, but you still have to be able to reach them. As per this guide, you need to do so while being totally undetected, and that's my specialty. The basics is using the clouds and terrain to your advantage, and a lot of it takes experience and practice. However, this guide will provide some places to start.


Canyon Ambush

This is one of the best maps to start practicing on. It provides some of the most cover with clouds as well as terrain. It's not as complicated as Paritan so you'll have an easier time flying and predicting your enemies movement. As you spawn in the map (in any map really) you'll generally be facing where your enemy spawned. On this map, both teams often group up and advance straight down the middle. This is where you get to disappoint them. Instead of barreling straight ahead, choose to shoot either left or right into the clouds and around the canyon. Assuming the enemy heads straight, you should easily be able to slip up behind them. Never try to fly out in the open. Keep aware of the different elevations in the terrain as well.

Instead of hiding in the clouds and flying around the cliffs, you can hide behind hills near the bottom of the map. For instance, near the blue side there's a massive drop off right near the entrance of the canyons. Hiding down under that can let the enemy pass up above you completely unaware.

One thing to note is where the clouds are. There's a lot of stationary clouds on this map, but they're floating roughly in the middle between the sky and ground, leaving open space below and above them. A lot of enemies like to fly either above or below, and some right inside the clouds. Try to keep track of where they are in relation to the cloud wall.


Paritan Rumble

One of my personal favorites. This map was made for the ninja. Lots of structures and clouds all obscuring the view. However, this also provides lots of hazards for even the best pilots to run into. Depending on your enemy, they may be flying high or low. Flying high lets you avoid a lot of the structures, but you're easily spotted. Flying low can often keep you covered, but they expect you down there. I recommend flying around near the edge of the map. The closer you are to the center, the easier you are to spot, while near the outskirts is a lot of interesting and deep terrain to slip between. Try not to travel at full speed, and communicate with your crew so you don't run into something.

All teams are highly on the lookout in this map, making it harder to remain totally unspotted. But if you proceed with care and use the buildings, clouds, and narrow passages, you can often get the jump on your enemy.


Duel at Dawn

Lots of clouds and terrain, but it's more deceptive than you think. A lot of these won't really hide your ship, and only give you the illusion of being hidden. This map, like the previous ones, keep crews on high alert, as you could be anywhere. Knowing the enemy teams spawn location helps, and since teams don't have an immediate view of each other, you can often drop down and high tail it to some better terrain to hide behind. There's a very large structure in the SE that can be passed around, although it might take some fancy flying. If you're going to be low on this map, you should be very very low, essentially scraping the bottom as you hide behind the smallest of scrap. Your enemy will be expecting you behind the bigger objects.

Fjords

Now things are getting more difficult. This map starts both teams with a plain view of each other, but also comes with a lot of subtle options players often neglect. The most obvious is the peaks right between the two teams. It's possible to fly under them and use the clouds or ship structure (depending on your direction) for cover as you approach from below. However, it's very easy to spot someone going for such a maneuver if they're not distracted. It's much easier to go from East to West than the other way.

The next path is the South side, where you can use the peaks and clouds to hide your route as you slip behind the mountain and arrive into more clouds where you can either rush out, or slip behind them through more clouds and behind more peaks (depends on location an which way you're heading). To reach that path from the East, try to travel high to get into the clouds. Going low will get your spotted easily. From the West you can either fly into the clouds behind you, or scrape up along the side of the mountain until you slip behind the peaks.


The less known path is actually along the North side. It looks completely open except for that long stretch of clouds. Most players doing fly that high for fear of being spotted, but the clouds actually provide really good and unexpected cover. You can then take this from East or West, again using clouds or terrain at the far side for extra cover.
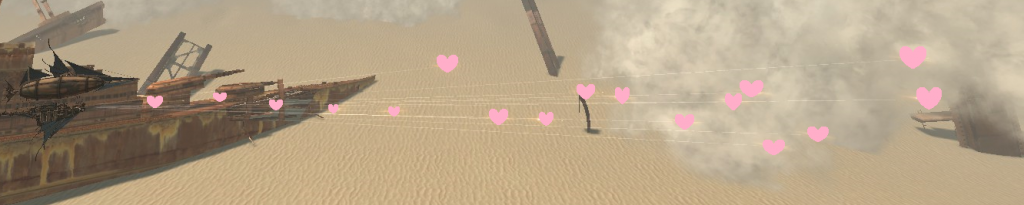
Battle on the Dunes

This is by far my favorite ninja map. You might be saying there's absolutely no way to get a squidsassin on this map, and that's exactly what I want you to think. Well, until now sadly. The benefit of this map is that it's so incredibly open, but also highly dynamic. Enemies will almost never expect you. It really helps with the moving clouds and sandstorms.

At the start of the map, pay attention to the cover. The clouds and storms will be moving west to east. If you're spotted at the start, start moving towards your enemy, or in any other direction until you're covered in a storm. If you can make it to the west behind the large structures due to a long chain of clouds and dust, do it. However, this is not your final stop. You will then continue to move with and behind the clouds, approaching your enemies ever so slowly. Very little do they expect you to be moving with the clouds, and you can arrive right next to them, as they all continue staring straight ahead, expecting you to come barreling out of the clouds in front of them.

If you can't make it west, go east. Follow the clouds and don't overshoot or lag behind them. Duck behind cover, and keep using the clouds to move. This can be a little slow and take time, but this level of stealth can be a game changer. You always want to keep an eye on your enemy. If you notice them getting swallowed by a dust storm, feel free to move openly, as their vision is completely gone. You generally want to hang low, near the bottom of the desert floor when there's not as many clouds, or when doing your final approach.

Also be aware of the hills and valleys. There's some surprising elevation differences you can take advantage of for cover.


A Few Final Notes

Once the approach is finished, you have to strike hard and fast. This is why a stealth ship needs to have an amazing crew. You shoot too soon, or miss a lot, and everything falls apart.

Make sure your communicate with your ally ship. This is something I often forget, and it comes back to bite me almost immediately. While I'm off being sneaky, my ally is being rushed by both enemies, or barreling straight at them. Two stealthy ships often don't work as well. If possible, you want your ally to act as bait and scout, keeping an eye on them, as well as giving them something to look at. As it's most common for ships to travel together, they often don't expect you to ambush them alone; easily scoring your a kill. While the enemy tries to react, your ally should already have been pushing in to help mop up the remaining ship. Rinse and repeat.

Never try do the same thing too often. You don't want to become predictable. If you keep on trying to slip up behind them from above, they're going to expect that, change it up so they're never sure where you're going to strike.

Sometimes it can help to change roles with your ally ship. Be the assassin the first couple kills, let the enemy know you're the sneaky one. Then 'accidentally' let them see you slipping around a cloud or structure. If your last few attempts were well executed, all of their attention should be on you, letting your ally do the sneaking and ambushing.

If you can't always remain hidden, use lots of misdirection and cunning. Like above, having your ally out and visible helps keep their attention on them. If you get spotted, make sure you appear to be going a certain route or predictable path. When you lose the spot, change directions. This works very well on dunes with the moving sand and clouds.

And again, make sure you communicate with your team. You don't want them trying to follow you and giving you away anymore than you want them getting rushed by the enemies.

((I'll try to get some videos up of some matches like this in action. ))

30
The Docks / [Holy] The Holy Celestium Order
« on: January 19, 2014, 12:05:06 am »
Holy Celestium Order: 2.0!


Welcome to the Holy Celestium Order! As of recently we've undergone a pretty major transformation, improving our forums and steam group, as well as setting up a clan Twitch and Youtube channel. Along with these changes are a number of other improvements including weekly clan events and better recruiting policies.


Holy Celestium Order is a friendly clan that's open to just about anyone. What we want are players with a good attitude just looking to have fun, or have a fire in their belly to do well in competitive matches. For our applicants we require at least 100 matches played, and that you don't go inactive for long periods of time without informing anyone. We currently use Teamspeak for most of our clan communications on a day to day basis. If you're interested in joining up, just head to:

HolyCelestium.enjin.com

And fill out the application on the site. Once accepted, we'll get you onto the Teamspeak to hang out with the clan and the steam group for upcoming event updates.

If you want to check us out before applying, that's cool too. We have multiple events each week, in particular we'll run the Holy Skies events on Mondays and Wednesdays at 2 PM and 7 PM EST, and Saturday at 2 PM EST. If there's a good turnout, we'll be streaming these events at
twitch.tv/HolyCelestium

We also have our Other Game Day where our clannies will play something besides GoIO for a bit. That happens every Friday at 7 PM. We'll announce the game here in these forums every Thursday, and if you want to join up just let us know. Those will also be streamed on our twitch.


See you in the skies!

Pages: 1 [2] 3